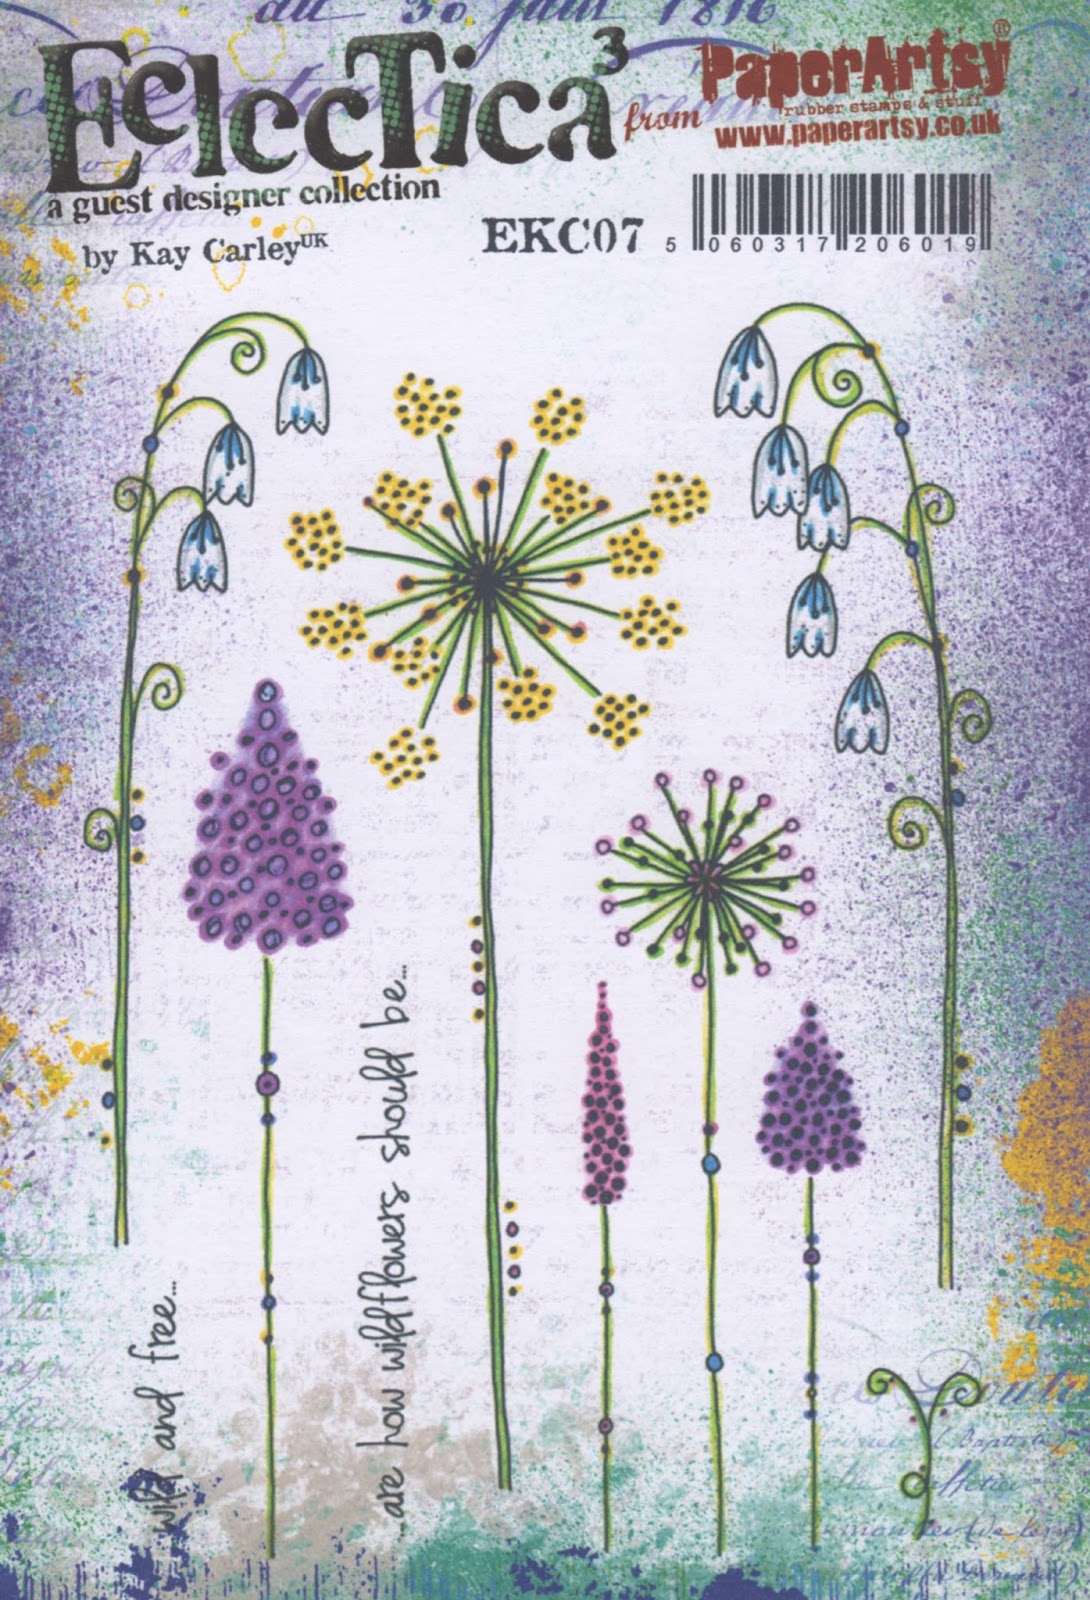
Yep I'm back again (as promised!!!) with another stepped out sample for you to see how I go about building my layers. This time I have used my
brand new stamp set EKC07.
This particular set contains a lot of smaller style of flowers but it is such a
useful set to have as not only does this slot in really well with all my other flower based stamp sets it also makes some fabulous
wildflower compositions all on it's own. This set is fast becoming a real
favourite of mine! Once again you can see there are a lot of
straight stems but as you now know (
see my previous post) I do this for a reason! Think about
grouping the
smaller flowers together to form a
cluster plus try stamping the flowers so that they
join together on o
ne stem to create
taller multi headed flowers. As for that little
swirl component (bottom right) - it has been designed that so that you can stamp it onto the
stems of the
smaller dotty type flowers and have it
sitting under the
flower heads or it can be used just as
swirly tendrils.
Step One (Above): Using a
sponge wedge, sponge a 12 x 21cm
Smoothy Card panel all over with
Chalk Fresco Finish paint then
streakily apply
Pixie Dust and
Tinned Peas Fresco Finish paint with the
sponge wedge.
Blend where the
two colours meet each other.
Step Two (Above): Stamp some
background imagery using
Leaf Green Archival. Paint the 'green parts' with
Tinned Peas and
Inky Pool Fresco Finish paints.
Step Three (Above): Add
dots to the
dotty flower heads with
Haystack and
Chalk Fresco Finish paints using a fine head of an
embossing tool.
Step Four (Above): Stamp the
foreground imagery in
Jet Black Archival sometimes arranging the
stems a little
differently on the
acrylic block before stamping out so that the
flowers aren't all straight! Then stamp some
green swirly bits using
Leaf Green Archival.
Step Five (Above): Paint over the
dotty flower heads first with
watered down Pixie Dust Fresco Finish paint then begin adding dots of
unadulterated Pixie Dust to the flower heads with a medium sized
embossing tool head.
A closer look (above) at step five.
Step Six (Above): Continue
adding dots to the
flower heads in this way (using the
Fresco Finish paints) swapping to
Lavender, then
Sugar Plum, Chalk and finally back to
Sugar Plum to build up
layered multi toned heads. Add dots of these colours to the
dots on the stems. Heat set the entire panel before stamping and embossing some '
ghost imagery' using
VersaMark and
Clear Detail embossing powder.
A closer look at step six so you can see both the dimension achieved on the flower heads and that clear embossed imagery which adds
subtle interest.
Step Seven (Above): Paint the
ghost like bells with
Gloss Glaze Fresco paint. Now paint a strip using
Chalk Fresco Finish, heat set, stamp the
wording onto the strip with
Jet Black Archival and paint over the
letters with
watered down paint - choosing colours
already used on the panel.
A closer look at the
painted wording for you.
Step Eight (Above): Adhere to a bigger card blank and edge with a black multi-liner. Apply some
Crystal glitter glue accents to parts of the imagery.
A closer look showing those
multi-toned flower heads as well as the
'ghost imagery'.
This shows how the
'ghost imagery' suddenly
appears when the
light catches the card as does the
Gloss Glaze painted into the bell flowers.
Obviously you could take this card a step further if you so wish by stamping and painting
extra flowers onto spare pieces of card,
cutting them out and
mounting them onto the panel which as you saw from my previous post really adds to the finished result but I wanted to show with this card that
a more simplistic approach looks good too. Instead of stamping and embossing those bell flowers with VersaMark and Clear Detail embossing powder you could swap to stamping them with black Versafine and emboss with the Clear Detail and them paint them to add another coloured layer to the panel. There are just
so many choices open to you when creating your
wildflower art with this set.
I shall be
back again on Saturday at midday sharing a
more detailed step out of the
buddleia card that I made
for launch night so please do pop back then!!
Love Kay xx
Facebook: https://www.facebook.com/kaycarley.designer/
Twitter: https://twitter.com/carleycards
Instagram: https://www.instagram.com/kay.carley/
Pinterest: https://uk.pinterest.com/kaycwilson1/


1 comment:
This is stunning, thank you for sharing your step by step design, very inspiring
Allison x
Post a Comment