Sunday, 7 February 2016

Cosmos Heart

Hellooooooo......................yep, I'm back again with another more detailed step out for you. On my 'launch night' over on PaperArtsy's blog I showed a step out of a papier mache heart using this new stamp set designed by 'yours truly'!!


But I actually had a lot more step outs than what I showed last week so I thought I'd take the opportunity to show you them on here so that you can really see how I go about building my projects!

So this is what I gathered together before I made a start on this project (see above).


 So to begin I gave the papier mache heart a base coat of Snowflake so that I could begin adding colour onto a white base. As you can see I used the reverse side of a small piece of Cut-n-Dry foam to apply the acrylic paint.

 Next I sponged on A Hint of Mint which is a beautiful (very pastel) shade of green - to be fair you can't really see any difference from this photo and the one before but I promise you it is on there and it did tint it a beautiful pale minty green!


I then stamped the frond grasses along the bottom and sides of the heart using a small piece of Cut-n-Dry (again) to apply Sage paint to the stamps. (This was my first time stamping with acrylic paint and I was amazed at how well it captured all the fine detail of my stamps.)

Next I stamped out one of my flowers using black archival ink but you might be able to see that as the papier mache isn't a smooth surface there were parts of the stamp that missed. However I always have a black multi-liner for occasions such as these so I just drew the missing bits back in!

I then began painting my petals in with Sherbert and Lilac Fresco Finish - both of these are opaque colours so I dipped my paintbrush into water each time before picking up some paint in order to make the paint a little more translucent.

As you can see from the picture above I carried on adding layers of Sherbert and Lilac in this way with a wet paintbrush and then did the same with Pansy - using a wet paintbrush to blend this darker colour into the lighter colours. (You can still see the stamped detail showing through these layers of colours due to applying them with a wet brush.) I then painted in the stems with Sage (also an opaque colour) but this time my brush was only slightly damp and you can see how that then obliterates the stamping underneath.

Here's a bit of a closer shot so you can see what I mean!

After painting in the flowers I felt that the grasses that I had previously stamped with the Sage acrylic paint were too pale so I traced over them with a light green Copic marker.

I felt that the heart was still lacking some colour so I then chose to sponge Sherbert all around the edges which immediately framed the flowers and added some much needed subtle colour.

I had purposely left an area vacant on the heart in order to stamp some words onto it. Before stamping my word with Pansy Fresco Finish I painted a little strip with Snowflake Fresco Finish in order to help frame the word. (As these stamps are based on Cosmos flowers which bloom mid to late summer I wanted the words on this stamp sheet to reflect warm summer days hence the words 'dreams', 'dreamy' and 'days of summer'. Even though 'days of summer' is all one stamp, enough room has been left between the words so that you can snip between them with scissors to give you more variations on this theme such as 'dreamy summer days', 'summer dreams' 'dreamy days of summer', 'day dreams' etc...)

Before adding Pearl Glaze to the flowers, word panel and the edges of the heart I added little dots of colour to the dots on the flower and grass stems and then drew all the detail back in onto the flower petals using that same black multi-liner that I spoke of before! (I tend to have several of these to hand in all different sizes but the one I used for this project was a 0.1mm.)

Once the Pearl Glaze had dried the whole thing had a thin coating of Gloss Glaze purely just to protect the heart.

And here it is all finished with some tiny rhinestones added. This is actually a fridge magnet so they make great little handmade gifts!

 Many thanks for stopping by and taking a look - I shall try to do more step outs in the future but meanwhile I have quite a few other bits and bobs to show you that I've been creating recently so do stop by again!!

By the way as I write this my stamps are back in stock at The Craft Barn!!!

Facebook: https://www.facebook.com/kaycarley.designer/
Twitter: https://twitter.com/carleycards
Instagram: https://www.instagram.com/kay.carley/
Pinterest: https://uk.pinterest.com/kaycwilson1/


United Kingdom
Artist Trading Post, Wirksworth, Derbyshire.
Birds in the Barn, Marks Tey, Essex.
Blade Rubber Stamps, Bloomsbury, London.
Clacton Arts and Crafts, Clacton-on-Sea, Essex.
Countryview Crafts, Potton, Bedfordshire.
Craftylicious, Bury St. Edmunds, Suffolk.
Imagine That..., Upminster, Essex.
Loobi Crafts, Leighton Buzzard, Bedfordshire.
Papermaze, Ipswich, Suffolk.
Stampers Grove, Edinburgh.
Swanstitch, Deal, Kent.
That's Crafty, Romford, Essex.
The Artistic Stamper, Faversham, Kent.
The Craft Barn, Merstham, Surrey.
The Craft Box, Barnsley, South Yorkshire.

The Craft Den, March, Cambridgshire.
The Forget Me Not Kraft Kabin, Hockley, Essex.

Continental Europe
Expression-Hobby, Marcinelle, Belgium.

PaperiSaDe, Turku, Finland.

Kerudoc Creation, St Yvi, France.

Stempelfee-Shop, Hilden, Germany.
Stempeloase Munich, Munich, Germany.

Bianca's Toko, Drenthe, Netherlands.
Hobbycompleet de Duif, Leeuwarden, Netherlands.
Leuke Stempels, Nijverdal, Netherlands.

Big Time Stempel, Gockhaisen, Switzerland.

USA/ Canada
Frantic Stamper Inc, Eagle Point, Oregon.
Simon Says Stamp, Columbus, Ohio.
Tupelo Designs LLC, Sugarland, Texas.
Vintage in KC, Johnson, Kansas.
- See more at: http://blog.paperartsy.co.uk/2016/02/new-pa-products-feb-2016-kay-carley.html#sthash.QSpFRDPd.dpuf
United Kingdom
Artist Trading Post, Wirksworth, Derbyshire.
Birds in the Barn, Marks Tey, Essex.
Blade Rubber Stamps, Bloomsbury, London.
Clacton Arts and Crafts, Clacton-on-Sea, Essex.
Countryview Crafts, Potton, Bedfordshire.
Craftylicious, Bury St. Edmunds, Suffolk.
Imagine That..., Upminster, Essex.
Loobi Crafts, Leighton Buzzard, Bedfordshire.
Papermaze, Ipswich, Suffolk.
Stampers Grove, Edinburgh.
Swanstitch, Deal, Kent.
That's Crafty, Romford, Essex.
The Artistic Stamper, Faversham, Kent.
The Craft Barn, Merstham, Surrey.
The Craft Box, Barnsley, South Yorkshire.

The Craft Den, March, Cambridgshire.
The Forget Me Not Kraft Kabin, Hockley, Essex.

Continental Europe
Expression-Hobby, Marcinelle, Belgium.

PaperiSaDe, Turku, Finland.

Kerudoc Creation, St Yvi, France.

Stempelfee-Shop, Hilden, Germany.
Stempeloase Munich, Munich, Germany.

Bianca's Toko, Drenthe, Netherlands.
Hobbycompleet de Duif, Leeuwarden, Netherlands.
Leuke Stempels, Nijverdal, Netherlands.

Big Time Stempel, Gockhaisen, Switzerland.

USA/ Canada
Frantic Stamper Inc, Eagle Point, Oregon.
Simon Says Stamp, Columbus, Ohio.
Tupelo Designs LLC, Sugarland, Texas.
Vintage in KC, Johnson, Kansas.
- See more at: http://blog.paperartsy.co.uk/2016/02/new-pa-products-feb-2016-kay-carley.html#sthash.QSpFRDPd.dpuf
United Kingdom
Artist Trading Post, Wirksworth, Derbyshire.
Birds in the Barn, Marks Tey, Essex.
Blade Rubber Stamps, Bloomsbury, London.
Clacton Arts and Crafts, Clacton-on-Sea, Essex.
Countryview Crafts, Potton, Bedfordshire.
Craftylicious, Bury St. Edmunds, Suffolk.
Imagine That..., Upminster, Essex.
Loobi Crafts, Leighton Buzzard, Bedfordshire.
Papermaze, Ipswich, Suffolk.
Stampers Grove, Edinburgh.
Swanstitch, Deal, Kent.
That's Crafty, Romford, Essex.
The Artistic Stamper, Faversham, Kent.
The Craft Barn, Merstham, Surrey.
The Craft Box, Barnsley, South Yorkshire.

The Craft Den, March, Cambridgshire.
The Forget Me Not Kraft Kabin, Hockley, Essex.

Continental Europe
Expression-Hobby, Marcinelle, Belgium.

PaperiSaDe, Turku, Finland.

Kerudoc Creation, St Yvi, France.

Stempelfee-Shop, Hilden, Germany.
Stempeloase Munich, Munich, Germany.

Bianca's Toko, Drenthe, Netherlands.
Hobbycompleet de Duif, Leeuwarden, Netherlands.
Leuke Stempels, Nijverdal, Netherlands.

Big Time Stempel, Gockhaisen, Switzerland.

USA/ Canada
Frantic Stamper Inc, Eagle Point, Oregon.
Simon Says Stamp, Columbus, Ohio.
Tupelo Designs LLC, Sugarland, Texas.
Vintage in KC, Johnson, Kansas.
- See more at: http://blog.paperartsy.co.uk/2016/02/new-pa-products-feb-2016-kay-carley.html#sthash.QSpFRDPd.dpu

Tuesday, 2 February 2016

Allium step out

See..................as promised I am back!!!

So without further ado I promised to show you a more detailed step out of how I created this framed picture.

Using the Allium stamp set

So here goes......
 Above are all the materials that I gathered up in advance including a 6x6" piece of white canvas.

 As you can see I both masked off a border around the square piece of canvas and then taped it down onto my craft mat so that it wouldn't move around. I then prepped it with Snowflake using a piece of Cut-n-Dry.

 Next I took another piece of Cut-n-Dry and sponged over the panel with A Hint of Mint whilst doing this I picked up a tiny amount of the Lilac Fresco Finish on my piece of Cut-n-Dry and continued dabbing and mixing it with the Hint of Mint. As I dabbed and sponged onto the canvas I was able to still allow some of the Snowflake base to show through.

 Next I stamped grass all the way across the panel using Sage Fresco Finish.

 Then I arranged two of the Alliums onto the piece of canvas so that I could judge where I wanted them to be.

 Then after removing the stamps I sponged Sherbert where I thought the Allium heads would end up being.

 Next I stamped the leafy sprig using Sage Fresco bending and arranging it onto the block before stamping it out so that it would fit nicely around the Allium heads.

 Next I stamped out all my main imagery using black Archival - again shaping and bending the stems before stamping them out. (For this stamp set I purposely designed the components all with straight stems so that they could easily be manipulated on a block to bend either to the left or right thus giving more versatility to the stamps.)

 After stamping out all my main imagery in black, I was then able to fill in any gaps with a butterfly which was stamped with Sage Fresco and then painted with Fresco Finish paints.

Then I painted in all the other imagery using Fresco Finish paints and also added dots of colour to the grasses to represent some tiny little flowers.

 As all the Fresco Finish paints I was using to paint with were opaque I had lost a lot of the detail of the imagery so I painstakingly drew it all back in with a black fine-liner!

Now this next bit is definitely normally unheard of...................... I reached for a needle and thread!!!!

As you can see from this close up I chose to sew on some clear seed beeds to add both texture and interest to the Alliums.


Then lastly I glued on some tiny rhinestones. Once the glue was dry I then mounted it into a deep box frame.

I am afraid that all the pictures really don't show just how pretty this is!! Unfortunately this was created on one of our really wet/dark days where it never got light so you'll have to take my word for it that it does actually look quite nice!!

If anyone fancies doing this as a class at my home in Bexhill-on-Sea, East Sussex or if anyone would like me to teach a class at their shop/store please do email me :).

I'll be back again soon with a more detailed step out of the heart fridge magnet using the Cosmos stamp set...............

Facebook: https://www.facebook.com/kaycarley.designer/
Twitter: https://twitter.com/carleycards
Instagram: https://www.instagram.com/kay.carley/
Pinterest: https://uk.pinterest.com/kaycwilson1/

Monday, 1 February 2016

I've Designed Some New Stamps!!!

So sorry for my lack of blog posts but I can now reveal that I have been 'super busy' behind the scenes designing two brand new stamp sets for the PaperArtsy Eclectica range!!!  I am SO excited to finally be able to show you them :)


If you go over to PaperArtsy's blog you will be able to see the wonderful samples that my very talented team created using these new sets plus a couple of step outs from me.

I would just like to thank my team mates - Emma Humphreys, Chris Dark and Helen Chilton for all their hard work and stunning samples and also Leandra from PaperArtsy for inviting me to become a guest stamp designer for their Eclectica range - it has been such an amazing and thrilling time for me!!! Below is a video of Leandra showing these new stamps and the amazing creations of my fabulous team.


Tomorrow I will show you the Allium step out (from PaperArtsy's blog) in a bit more detail.

Meanwhile I have just set up a brand new Facebook page that I will be using to post future classes, card samples etc.... so it would be great if you could pop on over and give it a like!!

Plus I have now set up both Twitter and Instagram accounts too so it would be fabulous to gain some followers!!  I have no idea as yet how to use them but I'm sure I'll work it all out eventually!!

Facebook: https://www.facebook.com/kaycarley.designer/
Twitter: https://twitter.com/carleycards
Instagram: https://www.instagram.com/kay.carley/
Pinterest: https://uk.pinterest.com/kaycwilson1/

See you tomorrow.............

Thursday, 3 December 2015

'Tis the Season

Oh goodness!! Sorry that I've been so quiet!!!  There is a VERY good reason for my 'quietness' which I can't reveal at the moment! Suffice it to say that I have been really busy these last couple of weeks with something that I am SUPER excited about! Just as soon as I can I will tell you all about it - soooooooooooooo excited!!!!!!!!!!!!!!!!!!!!!

Meanwhile I have suddenly realised that Christmas is fast approaching and I am now in full blown panic mode as I haven't done anything towards this yet!

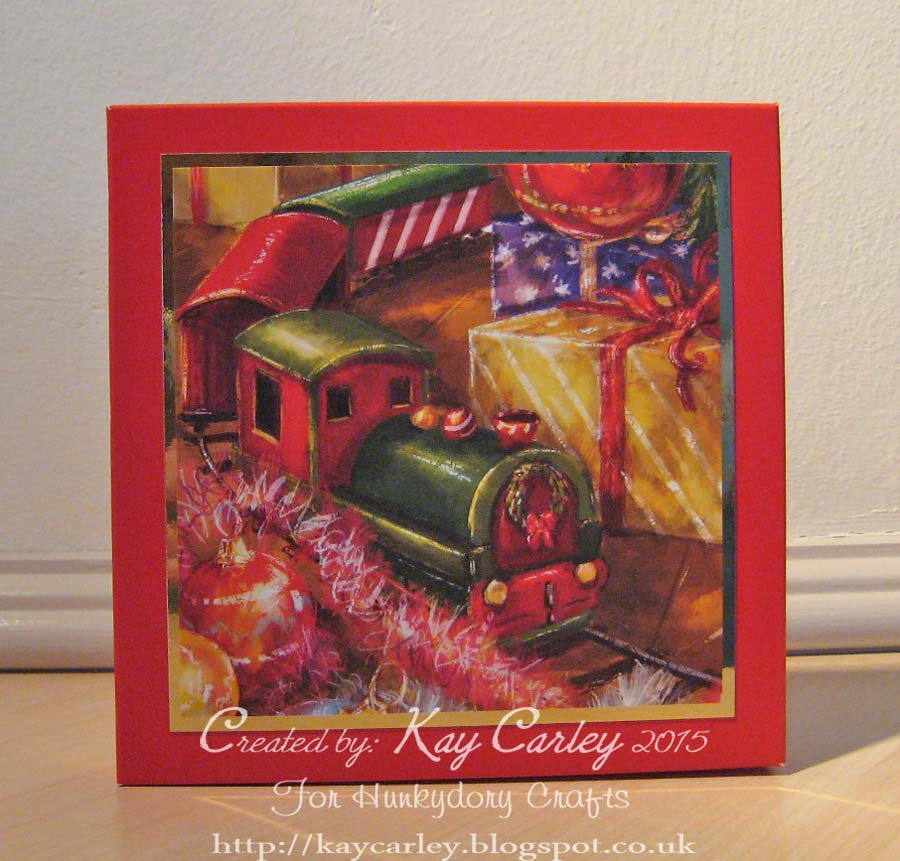
A couple of months ago though I made this card/box  for the launch of Hunkydory's Tis the Season collection.
This first photo shows the cover of the card which is a box lid. The image was taken from the matching Little Book and just trimmed down to make it into a square then layered onto a panel of gold mirri.

Next up is what is revealed when you take the lid off which in essence is a box base all decorated inside using the matching cardstock and the decoupaged element.

Then this is the inside of the card which has been decorated with one of the matching inserts.

Friday, 20 November 2015

Robin Redbreast

Oops I've been busy, busy, busy so I've been neglecting my blog again!!

I also going to be busy for the next few weeks so before I make a start on my next assignment I thought I'd stop by and quickly share a card with you that I made using Hunkydory's Season's Greetings/Windows to the Heart collection.
 So this was made using one of Hunkydory's side stepper card blanks which I covered with Evergreen Adorable Scorable. The main Robin Redbreast panel was taken from The Second Little Book of Festive Poetry and all the other toppers and borders came from the Season's Greetings Collection.
I also used a matching insert to decorate the inside. I love to finish my cards off in this way :).

I have yet to make any of my Christmas cards this year and I've a feeling that it will be a last minute dash with some Hunkydory makes!!

Monday, 16 November 2015

Brusho With Mica

Hi everyone.  Yesterday I took my last class of the year for The Craft Barn so I thought I'd share with you a couple of the cards that I designed for this class using stamps by Woodware.

The cards were created by stamping and embossing the imagery before adding Brusho, then whilst the cardstock was still wet (from spritzing the Brusho) Pearl Mica powder was sprinkled over the top which gives a lovely shimmer to the snowy looking cards. For proper snowflakes Chunky White embossing enamel was sprinkled over the top and for some extra sparkle I added a little Crystal glitter glue here and there.

The Brusho colours used were Prussian Blue, Ultramarine and Lemon - I love this combination to give a wintery, snowy sky. The trees and wording were taken from Woodware's Winter Wishes stamp set and the star was taken from the Huge Snow stamp set. The pictures below shows the shimmer that was created from sprinkling the Pearl mica. The light rays from the star was achieved using a Clear Sakura Stardust pen.

For this card I used the same three colours of Brusho for the background and just introduced the Black and Gamboge Brusho for the snowman's nose, hat and mittens. The same Woodware stamps were used on this card along with the introduction of Funny Snowman. Once again you can see the shimmer a bit better on the card below of the mica.
I hope you like them!!

Thursday, 5 November 2015

Demo at Sharon's Card Crafts 12th Nov

Hi everyone.

I'm just stopping by to let you know that next Thursday (12th November) I will be demoing some of the latest releases by Crafter's Companion at Sharon's Card Crafts in Swanley, Kent from 10am-4pm.

Amongst the products I'll be demoing will be the fabulous Accordion Dies with matching Everyday Overlays, some of the new Create a Card Collection and the fabulous new Sparkle Spectrum Noir pens. So if anyone is in the area do stop by and say hello :).

This is one of the cards I created with the Rectangle Accordion Die when I was last there using one of the Christmas Overlays along with one of the Perfect Partners stamps by Sheena.
It's amazing the sort of cards you can create with these Accordion Dies!!

Thursday, 22 October 2015

Sneaky Peek of Brusho class

Hellooooooo - today I thought I'd share just a little sneaky peek of part of one of the cards we'll be making on my Blinging Up Brusho class for The Craft Barn on Saturday 31st October.
All stamps used are by Woodware :).

Thursday, 15 October 2015

Poinsettia Accordion

Today I thought I'd share a card that I created for my demo at Sharon's Card Crafts in Swanley last month using Die'sire dies combined with a Sheena die. (I'll be back at Sharon's on 12th Nov demoing with more Crafter's Companion products :))

The dies were cut from Centura Pearl cardstock and I just kept it all very clean by sticking with just the one colour. I added some glitter glue to the poinsettias but you can't really see it in these photos so you'll just have to take my word for it - lol!!
Dies used were Die'sire Create a Card Square Accordion with the Die'sire Ivy Square Overlay. (Keep a look out for a project using these dies in the next issue of Making Cards magazine ;)!!) The poinsettia die is Sheena's Perfect Partners Festive Fancies Poinsettia. Such a beautiful die :).

Obviously you can jazz this up as much as you like but for my demo I had just wanted to show what can be achieved with minimal effort :).

Tuesday, 13 October 2015

Less Is More

Hellooooooo again!!  Today I thought I'd share one of the cards I created last year using products by Crafter's Companion.

This cute little Party Paws character was coloured using Spectrum Noir pens and the background was just a piece of Centura Pearl cardstock embossed with an Embossalicious Baubles folder with a little Shabby White embossing enamel sprinkled along the base of the panel.

A very clean and simple card.

Friday, 9 October 2015

Just For You

Look at me...............I'm back again with another post!!!  It won't last - lol!!!

Today I thought I'd share a card that I created a lot earlier in the year for my demo at The Glitter Pot before they closed their doors - do you ever get the feeling that I spell 'death' to our local craft shops!!!  (They all close on me!!!!)

Anyway here is  one of the cards that I did for this demo using a fabulous Penny Black cling stamp called Divine for the main image. The supporting imagery came from a Penny Black clear stamp set called Sprigs and the little words and butterfly are from another Penny Black clear set called Snippets which is just full of really handy small sized font words - just perfect for squeezing into little spaces!!
The colouring was done using a combination of Copics and Distress Markers - I just love the texture that can be created by combining them.

For added interest I cut up a Flourish die by Penny Black and glued little pieces of it where I felt I needed some decoration and that's it!!

See you next time.............

Wednesday, 7 October 2015

Ahoy There!!

Now don't faint!!!  But here I am again with another post!

This time I thought I'd share a card with you that I made from one of the topper collections in Hunkydory's Tots 2 Teens Collection. This was originally made for the £1 Million Giveaway launch shows on Create and Craft and you can still take advantage of this amazing offer on Hunkydory's website.

 As you can see I chopped into the cardstock quite a bit for this one to make a dimensional stepper card. The actual stepper card was created out of some red Adorable Scorable cardstock with each of the steps decorated with the matching pirate cardstock and topper.

I really enjoyed creating cards with this collection :).